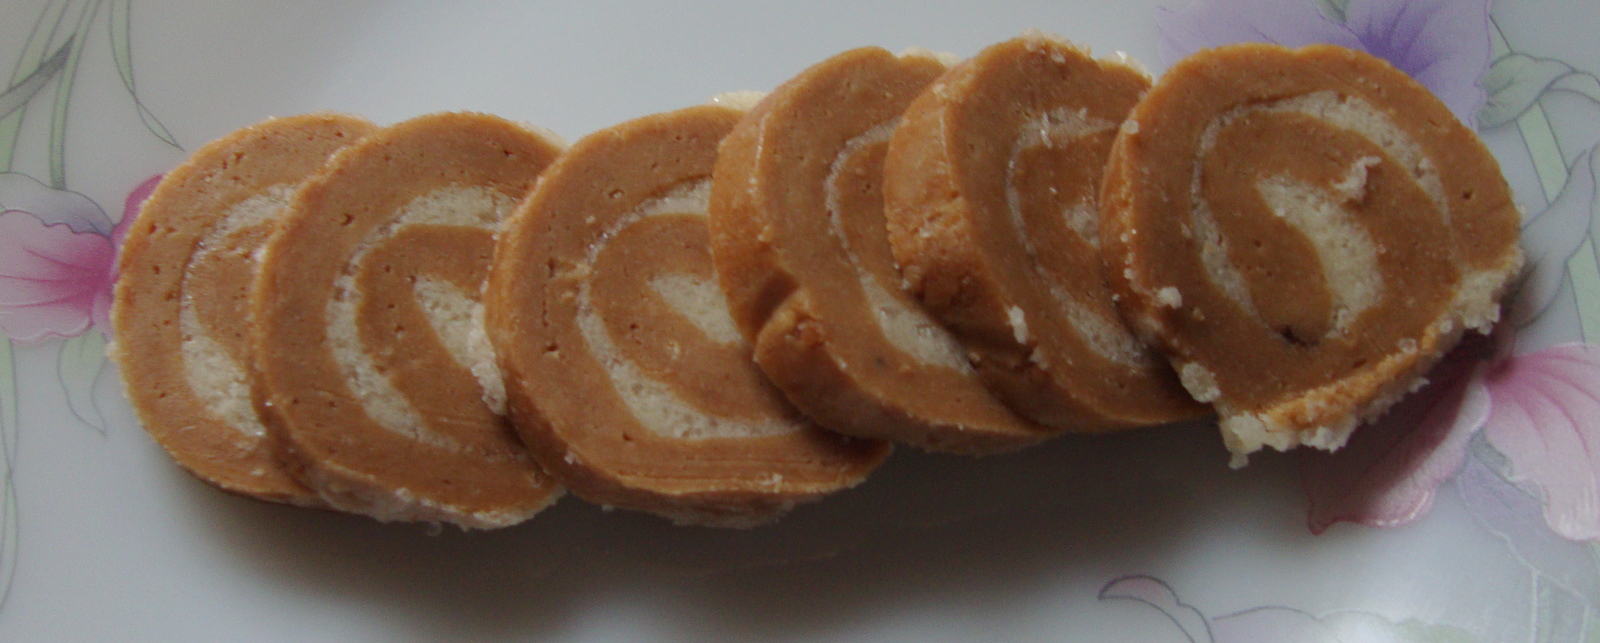
Showing posts with label Dessert/sweets. Show all posts

Monday, July 4, 2016

Corn Flour Halwa

If you do not mind a slightly soft textured sweet, this is just the one for you. Easy to make. Not much fat in it. And quick.  Just make sure you add more nuts than I have and it would taste even better adding to a crunch to the soft textured sweet.  If you wish, this can be also served in a bowl instead of allowing it to solidify and cut into pieces.  Recipe from Uma's Kitchen


Ingredients: Serves 6 persons

Corn flour - 1/2 cup *
Sugar - 1 1/2 cup **
Water - 1 and 1 1/2 cup ( 2 1/2 )
Ghee - 2 tbsp
Cashewnuts - 1/4 cup - roughly chopped
Cardamom powder - a big pinch
Food colour - large pinch

Take about half tbsp of ghee and fry the chopped cashew to a golden brown
Keep aside.

Grease a plate with ghee and keep ready

In a bowl, mix the corn flour, colouring and 1 1/2 cup of water.  Ensure there are no lumps. Keep aside

In a heavy bottomed pan or non stick pan, take the sugar and add the balance one cup water. Keep on heat. Let the sugar dissolve completely and begin to get sticky and thickish.  ( do not have to check string level)

At this stage, take the corn flour mixture, mix again and add to the sugar solution that is still on the heat.
Keep stirring continuously as you add.
Continue to stir.
It will form some glossy parts scattered in the mixture as you keep mixing. Continue till it gets thick. The colour will change and turn glossy.

At this stage add the ghee and keep stirring.  The mixture will boil up and also come together. Getting more glossy. Add the cardamom powder, cashew bits.  Stir in. Turn off the heat.

Pour into the greased plate.  Allow to cool for about 1-2 hours. Cut into pieces.


* you  can also add flavoured custard powder instead of corn flour
** you can add a little less sugar as I did.  It tasted sweet enough
You can add any kind of nuts and a little more than 1/4 cup will add great texture to the halwa

Friday, January 16, 2015

Khubani ka Meetha

This is a lovely dessert from Hyderabad.  Made with dried apricots.  With very little effort.  A favourite at weddings.  Especially on a cold day, you should have this with a little cream.  Or maybe some custard, or even a dollop of ice cream.  We had it just plain.  And slightly chilled.   Recipe from Vah Chef.


Ingredients:
Dried Apricots
Sugar to taste
Cream/ Custard/ Ice cream.

Soak the apricots for a few hours in water.
They will plump up and you can then cut them into half and pit them.
Keep the pit/stone aside.  And the water in which the apricots were soaked.

The stones can be split and the seed inside should be removed and kept.
They will be added to the dish.

Now take the sugar in a pan..  This would depend on how sweet the fruit is.
One can always adjust the sugar later.
Add the water in which the fruit was soaked.
Keep on fire till the sugar dissolves.
Add the sliced apricot to it.

It will start to thicken a bit.  At this stage you can mash the fruit lightly.
It is a matter of preference, but always better to keep a bit of fruit rather than make it a puree
Add the seeds now.  Keep on flame for another five minutes or so.

The whole process will not take more than 15-20 minutes from time of ccoking.

Keep aside.
Spoon into bowls and serve with cream/custard/ice cream.  Or eat it plain as I did.

Wednesday, October 29, 2014

Doodh Peda with condensed milk

Sa sent me the picture of the Doodh pedas that she made for Diwali.  They look so good.  Pedas are generally not the easiest dish to make.  However, she sourced this simplified recipe that uses condensed milk and milk powder from Subbu's Kitchen.  And what can be better when you have a recipe that is easy to make but yet tastes so good !


Makes about 25-30 pedas ( depending on the size)

Ingredients:

Sweetened condensed milk - 1 tin ( 400 ml)
Milk powder - 4 cups (1 litre capacity approx)
Ghee - 4 tbsp
Cardamom powder - 1 tsp ( optional)
Saffron threads - few
Pistachios - few
Milk - a little to soak the saffron

Soak the saffron in milk - keep aside

Take a pan, heat the ghee
Add the condensed milk to the ghee in the pan.  Stir well.
Now add, the milk powder.  Keep stirring.
The mixture will begin to thicken

Add the milk with saffron threads.

Keep stirring.  The mixture will thicken further and you will find that it doesn't stick to the pan and you will be able to roll it in the pan with the ladle

The mixture would also have acquired a nice colour

Remove from heat.
Cool slightly till you are able to handle the mixture by hand
Take a lemon sized quantity of mixture and roll into a smooth ball, apply a little pressure and make a dent in the middle
Do this with the rest of the mixture
Place a pistachio in the dent in each peda.

Delicious Doodh peda is ready !

Saturday, July 26, 2014

No Bake Blueberry Cheesecake

K made this lovely blueberry cheesecake.  It looked good.  It tasted good.  Never mind if it was not exactly the healthiest... anyway, K browsed through various sites and then combined two recipes keeping in mind the ingredients that were available to her.


Ingredients:
( Crust and filling - Joy of Baking )

Crust:
Graham cracker crumbs or digestive biscuits (crushed) - 1 1/2 cups (150 grams)
White sugar granulated- 2 tablespoons (30 grams) 

Unsalted butter, melted - 6 tablespoons (85 grams) 

Filling :
Cream cheese, at room temperature - One 8-ounce (227 grams)
Granulated white sugar - 1/4 cup (50 grams) 
Vanilla extract - 1 tsp
Heavy whipping cream - 1 cup (240 ml) 

Topping :
Recipe - UK tv 
Cornflour - 1 tsp
Lemon - 1/2 - juiced
Caster sugar - 40 gms
Blueberries - 200 gms

Preparation - 
Crust - 
In a large bowl, mix together the graham cracker crumbs, sugar, and melted butter.
Press onto the bottom and up the sides of a well greased 8-9 inch (20-23 cm) tart pan with removable bottom. A spring form pan can also be used.
Press the crumb mixture onto the bottom and about one inch (2.5 cm) up the sides of the pan.)
Cover with plastic wrap and place in the refrigerator to chill for an hour while you make the filling.

Filling -
In the bowl of your electric mixer, or with a hand mixer, beat the cream cheese until smooth. 
Add the sugar and beat until light and fluffy. Scrape down the sides of the bowl and beat in the vanilla extract. 
In a clean bowl, beat the whipping cream until soft peaks form. 
Gradually fold or beat the whipped cream into the cream cheese mixture. 
Pour the filling over the chilled graham cracker crust and smooth the top. 
Cover and place in the refrigerator for about an hour 

Topping -
Take cornflour in a small saucepan
Stir in lemon juice and make it a smooth mixute
Add 2 tbsp of water, sugar and blueberries
Cook over medium heat for 2-3 minutes
Stir till blueberries are softened and sauce thickened to a rich colour
Leave to cool, cover and chill

Once cooled spread the blueberries topping over the crust+filling and return to the refrigerator to chill for several hours, or even overnight.

Remove the base and carefully slice and serve.  Keep any leftover ( if any ) in the refrigerator.


Monday, April 7, 2014

Sticky Date Pudding with Toffee Sauce

A Donna Hay's Recipe - very nice, very simple.  I used dates that were mildly sweet and the topping with toffee sauce was perfect with the pudding.


Ingredients: ( Serves 6 )

Chopped Pitted Dates - 210 gms
Boiling Water - 250 ml - 1 cup
Soda bi carb (baking soda) - 1 teaspoon
Butter (chopped) - 100 gms
Brown sugar - 135 gms
Eggs - 2 nos
Self Raising Flour - 150 gms

Toffee Sauce ( I made just a third of this so make accordingly)
Butter - chopped - 150 gms
Single pouring cream - 250 ml
Brown sugar - 265 gms

Double cream - if you wish to put a dollop on the pudding

Place pitted dates, water and soda bicarb in a bowl - allow to stand for 5 minutes
I processed it to make an even mixture
Add butter and sugar and process till well combined

Now add eggs and flour and mix till just combined

Preheat the oven to 180C
Grease and line a 26cm x 16 cm square tin with non stick baking paper

Pour in the tin
Bake for 30-35 minutes till cooked - test with a skewer

Cool in tin for 10 minutes.
Cut in squares.

While it is cooling -  make the toffee sauce
Place butter, cream, sugar in saucepan over medium heat
Still till butter has melted
Bring to boil, cook for 5 minutes or till it thickens slightly.
Spoon over the squares
Put a dollop of cream (optional ) but it is really tasty when you do

* ( the above pic is when the toffee sauce has cooled down.  A few seconds in the microwave and the toffee sauce melts a bit... so have it the way you want it .. )

Sunday, November 3, 2013

Chocolate Vanilla Burfi

Another recipe from Rak's Kitchen.  I knew I had to make it for Diwali. It was almost like the store bought one.  But I think I went past the one thread sugar syrup stage just a wee bit.  And I would cut down the sugar the next time I make it.

It will never fail to impress.
Happy Diwali to all of you!


There are two layers here. To be made individually. The white portion or the vanilla burfi layer and the chocolate layer

Makes about 15 pieces.

Vanilla layer -
All purpose Flour - Maida - 1/2 cup
Ghee - clarified butter - 1/4 cup - melted
Sugar 1 cup (I would reduce this to 3/4 cup the next time, I found it a little too sweet)
Vanilla essence - a few drops

Chocolate layer -
All purpose Flour - Maida - 1/2 cup
Ghee - clarified butter - 1/4 cup - melted
Sugar 1 cup -( I would reduce this to 3/4 cup the next time)
Cocoa powder - 1 tbsp

Heat ghee in a pan to a point where you test with a bit of maida, it should get sizzle.
Add the maida to it, and fry briskly till the raw smell of the flour is no longer there - about 3 minutes.
Make sure you do not brown the flour.
Keep aside the flour.

Grease a tray and keep ready. A small tray is fine.

Take the sugar in another pan, add about 1/4 cup water.
Bring to a one string syrup stage.
This has to be monitored closely.  Test syrup between thumb and forefinger.

Take off the heat.
Add the fried maida to the syrup.
The vanilla essence
Mix well. It will thicken to a thick mass.  This should take about 5 minutes

Immediately pour onto the greased tray.
Smoothen with a greased plastic sheet or a greased ladle (which you will notice I did not do !).
The layer should be thin since it will have another layer ( chocolate ) on top.

For the chocolate layer:
Same procedure to be followed though here after you fry the maida, add the cocoa powder and mix well
Make the one string syrup, take off heat, add the chocolate flour, mix well

Pour over the vanilla layer.
Smoothen.

Let it set.
Cut into pieces after about 1/2 hour and let it set for some more time.
Remove while slightly cooler.

Note: Where I erred
The syrup stage, I got a call and I think one of the layers went into the next stage of sugar cookery
Cut down the sugar - it was a little too sweet for me

But despite that, I got a fairly good product.  And it can only get better with another attempt.


Wednesday, October 30, 2013

Mysore Pak

N turned one today.  This definitely called for a preparation of something sweet.   I found this one at Uma's Kitchen.  And it turned out good.  Just the right amount of ghee and the sweetness was just right.
Happy Birthday little one....


Besan ( chickpea flour ) 1 cup
Sugar - 1 cup
Ghee (clarified butter) 1 cup - soften if solid
Water - 1/4 cup

Roast the chickpea flour till the raw flavour is lost. Over low heat. Do not burn 3-5 minutes
Take off heat and keep aside
Sieve the roasted flour so that there are no lumps
Grease the tray in which you will pour the mysore pak to set
Pour the sugar and water in a pan and heat till you get a one string consistency.
Keep a close watch, this happens quite quickly

Now add a small amount of the ghee and then the flour little by little
Stir vigorously
The more you stir, the fluffier the product
Keep adding the ghee
If possible have a helper with you.  Makes the job easier
As the mixture becomes thicker it will come together, bubble and leave the sides

Pour into the prepared greased tray
It will set soon
Cool a bit, and make the desired shapes when still slightly warm

Enjoy
A variation that I found at Sharmi's Passion - will try it next time


Saturday, July 6, 2013

Sandwich Cookies

Sis in law C has been making these yummy treats.  This recipe was from the packaging off a cookie cutter.  And we used the jam prepared from home grown strawberries - see that lovely red colour - no additives !!

Ingredients
All purpose flour - 2 cups
Freshly ground almonds or almond meal - 2/3 cup
Ground cinnamon - 1/4 tsp
Butter - 1 cup ( 2 sticks) softened
Granulated sugar - 2/3 cup
Egg - 1
Vanilla Extract - 1/2 tsp
Jam
Powdered sugar

In a bowl, combine flour, almond meal, cinnamon.  Keep aside.

Preferably use a electric mixer for best results -
In another bowl, beat sugar and butter till light and fluffy
Add egg and vanilla and mix well
Add the flour mixture.  Mix till incorporated.

Divide dough into two parts.  Make small disks and wrap in plastic wrap
Refrigerate for 2 hours or till firm to roll

Preheat oven to 350F
On floured surface roll out one disk of dough 1/8 " thick.
Keep remaining dough chilled
Cut half the dough with the cookie cutter.  Bottom cookie that is full without a pattern
Keep on parchment paper lined baking trays.
And the top part of cookie using a cutter that will give the pattern so that the jam shows through

Bake 10-12 minutes till light golden brown.
Cool on cookie sheet for a couple of minutes.
Remove and cool completely

Dust the top cookies with powdered sugar

On the full cookie spread about a teaspoon of jam in the centre.  Place the top cookie.  And voila ....


Loved it !

Friday, June 21, 2013

Tradewinds Cheesecake with fresh Mango

My sis in law C made this lovely cheesecake.  It was just delicious.  Fairly simple to make if you have the ingredients.  And can be made well in advance.  And looks so good.  When it was ready to serve, I just sat and savoured every bite.   I simply forgot to take a picture of the generous slice that I had


Ingredients:

Cream cheese - 2 pks of 8 ozs each
Sugar - 3/4 cup
Eggs, large - 4
Light or regular sour cream - 1 cup ( sour cream used here)
Orange flavoured liqueur - 2 tbsp ( you can even use 1/2 tsp grated orange peel instead)
Vanilla - 1 tsp
Mango slices
Mint sprig for garnish

The crust:
Coconut Macaroon cookies - 1 1/2 cups
Butter - 1/4 cup - melted

Crush the cookies into powder
Add melted butter.
Mix well.
Press the mixture evenly over bottom of a 9" pan with a removable rim
Bake at 325 F until lightly browned - for about 15 minutes  (160C)


As that is baking you can do the rest

In a large mixing bowl, beat cream cheese, sugar until creamy.
Add eggs one at a time.  Beat well after each addition.
Add sour cream, liqueur and vanilla and beat till well blended.
Pour over crust
Bake in oven at 325F until center of the cake jiggles slightly when shaken.  This is about 45 minutes.
Cool completely on rack
If made ahead, cover with cling wrap and chill until required.

If you like you can add a fruit sauce of choice. But this can make it too sweet. So C avoided that.

When time to serve, gently remove the rim and allow to sit on the serving plate.  Place slices of mango and garnish with mint. Cut into wedges and serve.  Yum ! Yum ! Yum


Wednesday, August 15, 2012

Biscuit Brownie

A no baking biscuit brownie.  That even a kid can make.  And so we made B make it.  And it turned out yummy.  Recipe is from Edible Garden and she even has step by step pictures.

Ideally give four or more hours of refrigeration.  And if you do not have the patience, a two hour wait will also do.  You will get nice chewy brownies rather than stiff ones.  Makes no difference to the taste.  But if you wait, you will get better pictures.


Ingredients:
Marie Biscuits - 20 nos
Cocoa unsweetened - 3 tbsp
Cashew/Almond mix - 1/4 cup - roasted - any nut will do
Condensed Milk - 200 gms ( which is roughly half a tin)
Instant coffee powder - 1 tsp ( optional)

You can add 2 tsp of sugar if you would like it sweeter (optional) - not really necessary

Take a bowl.
Powder the Marie Biscuits.  Allow a few coarse pieces too.  Adds to the crunch
Add the cocoa powder and the coffee powder.
Mix well.  If you are adding the sugar do it here.
Dry roast the nuts of your choice. And make into small pieces.
Add this to the mixture.
Now slowly pour in the condensed milk.  Keep mixing - with a spoon
It will be a slow mix since the mixture is sort of a wet solid.  Make sure all ingredients are blended well.

Line a bowl/tray with greased paper.
Pour in the mixture.
With slightly moist fingers, press down the mixture and level it.

Keep in the refrigerator for a minimum of 4 hours.  Or overnight if you can resist taking a bite.

Cut into pieces.  It will not last long.  So I honestly do not know the shelf life.  But if refrigerated I guess it will keep for at least 10 days.


Thursday, August 2, 2012

Coconut Barfi - Variation

I had the coconut from the Lakshmi Puja.  And I had thought of making coconut barfi and coincidentally found the post on Rak's Kitchen.  I had made it earlier but I thought this seemed so much simpler and believe me it was!  My barfis did not come pearly white like her's but I suppose that was because I had to pry the coconut meat out of the shell with a knife and then put into the blender so the outer brown covering is present as brown specks.  I could have camouflaged it with some colour.  But I did not want to.


Ingredients:
Grated coconut - 1 heaped cup
Sugar - 1 cup ( I thought the quantity could be reduced a little )
Ghee - 1 tsp - for greasing the plate
Cardamom powder - 1/4 tsp

Optional - cashew nut pieces fried in ghee

Keep a greased plate ready.

Take a pan and add the coconut and the sugar and keep on low flame.
Keep stirring.
The sugar will start melting and soon begin to froth.
Keep on stirring - and take care not to allow the coconut to brown
And as you go along, the sugar will become more bubbly and the mixture will slowly start to come together
As it begins to leave the sides of the pan - it is a sign that the mixture is ready for pouring onto the greased plate.
Quickly blend in the powdered cardamom and also fried cashew at this stage

Put onto greased plate / tin and flatten it with a greased foil to get a shiny smooth surface
Lightly cut the mixture into squares when the mixture is still warm
It is easy to remove the cut pieces when the mixture cools down

( If you remove the mixture from the pan a little too early - you will know - since the mixture refuses to set - as it did with mine initially.  Just put it back in the pan for a while and heat again.  This time from experience you will know when to remove it - and it probably just required a minute more of the heat)

Store the pieces in a closed container.  I guess it should last more than a week but one never knows.  The barfi gets over in no time so where is the question of shelf life?

Thursday, July 19, 2012

Bread and Butter Pudding

This is a partly microwaved version that tastes better than it looks.

This dish was not planned. I had seen this lovely panna cotta and wanted to make it.  But for some reason the dish made with agar agar did not set.  So I was left with this slightly sweet creamy mixture that I thought I could put to better use.  And so the idea of the bread-butter pudding.

I read that the bread butter pudding was possibly a way to use stale bread. And many swear that the dish with fresh bread does not taste as good.   This one here is a basic dish and you could use nuts, chocolate, lemon zest, a marmalade glaze..the options are endless. 


Ingredients:
Bread Slices - 4 nos - ( I used brown bread here)
Egg - 1
Milk - 1 cup
Sugar - 1/4 cup
Cream - 1 cup ( you could use much less)
Vanilla essence - 1/4 tsp
Butter - 25-50 gms - I used salted

I toasted the bread since this was being made in the microwave - skip this if you are baking the pudding.

Butter the bread.
Cut into triangles or cubes
Place with the crust side up in a microwave safe dish
Beat the egg, milk, cream and sugar lightly
Pour the beaten mixture over the bread and keep awhile till the liquid is absorbed by the bread.
Microwave for 4-5 minutes till done
(Better still bake at 180 C for 15-20 minutes)


You can eat this warm.  I liked it better when it was cold.  And if you like french toast you would like this for sure.

Sunday, June 17, 2012

Shahi Tukda - with a twist

This is a different kind of Shahi Tukda.  Another recipe from Rak's Kitchen *  I ran out of cornflour but had custard powder.  I mean custard powder is after all cornflour with a flavour - and this fortunately had just vanilla.  It was quite nice.  Of course, not the original Shahi Tukda but was nice and light. I had an able assistant with the younger one at home. And  Happy Birthday V.


Ingredients:
Bread Slices - 2 nos ( I used brown bread) - with the crust removed.
Milk - 200  ml
Sugar - 1/2 cup
Ghee - 4 tbsp
Cornflour - 2 tsp (in this case I used vanilla flavoured custard powder)
Saffron - pinch
Nuts - for garnish

Preparing the bread
Cut the slices from which the crust have been removed into triangles
Put a little ghee on a pan, and when it melts add the triangular slices and allow it to brown evenly and get crisp.  Remove and keep aside.

Make the syrup
Take the sugar in a bowl.
Add water so that it just covers the sugar layer.
Heat and make a thick syrup.  It should not flow easily.  But do not allow it to crystalise.

Make the custard
Dissolve the custard powder in about 2 tsp cold milk and add to the remaining milk
Heat till you get a fairly thick custard.
(Addition of sugar to custard is not necessary -optional - or like I did just add a tablespoon)

NOW:
Take the fried bread and immerse in the syrup for just a minute or less.
The bread should not be soggy.
Remove and keep on a plate.  Do this for all slices.

Arrange the slices on a plate
And pour the custard on the slices - allow some time for the bread to soak some of it
Garnish with nuts.

Have it warm.  Or chilled. Will be enjoyable either way.

What you can do different:
Use white bread
Deep fry the bread - you will get a uniform browning - but mind the calories
Toast the bread and then lightly apply the ghee and toast again if required.
Make a nice rabri - by thickening the milk - reduce it on a low fire till thick
Or use condensed milk.
Garnish with pistachios

* Link to Rak's Kitchen 

Tuesday, April 10, 2012

Coffee Cream Wheel

This is a no-bake recipe. And extremely simple.  Saw it at Ria's Collection.  However, it had too much of a buttery taste for me and I guess it was just too rich.  I am hoping there can be a variation that can make the dish a little less heavy. Any suggestions?

Ingredients:
Marie Biscuits - 125 gms
Sugar - 75 gms - powdered fine
Instant coffee - 15 gms ( 1 tbsp)
Butter - 50 gms
Pinch of salt
Warm water - 1/4 cup
Vanilla essence - 1/4 tsp

Powder the biscuits to a fine powder.
Add the coffee powder to the warm water and add to the biscuit powder till it forms a soft dough that can be rolled.  Keep aside.

Cream butter and sugar and add the vanilla essence.

Take a square foil
Roll our a ball of dough to a rectangular shape about 1/4" thick

Spread thinly a layer of the butter cream

Now take the dough at the smaller side of the rectangle and start to roll it.
It may just crack at the beginning, but that does not matter
Once you start it, it can be rolled easily
Roll all through.
Wrap with the foil and freeze for about an hour till it becomes firm.

Cut into circles.

As Ria suggests, it may be could be ideally accompanied with ice-cream.  That could just camouflage the butter-iness
Enjoy.


Saturday, April 7, 2012

Moist Date Cake - In the Microwave

This recipe from Tickling Palates has been modified to get some colour since it was made in the microwave.  If you want the rich colour you will have to bake it.  But this one still tasted lovely.

This recipe is amazing.  The first time I made it tasted good but was absolutely pale in colour and then Radhika of Tickling Palates advised me to use brown sugar which I think is a very good suggestion.  I did not have stock of it when I made this second attempt and therefore I caramalised the sugar and added some coffee brew to it to get a slightly brownish colour.

Maida - 1 cup
Sugar - 1/2 cup
Baking powder - 1 tsp
Salt - pinch
Dates - pitted and cut finely - 1/2 cup
Water - 1 cup
Vegetable oil - 1/4 cup
Coffee brew - I used good kapi decoction - 2-3 tbsp
Cinnamon powder - 3/4 tsp

Grease a microwave bowl. I also used some greaseproof paper to line the sides and bottom

Pass the Maida and the baking powder through a sieve a couple of times.  Keep ready

Take a thick bottomed pan.  Add the sugar and on a low heat keep till the sugar dissolves and caramalises slightly.  Do not let it turn to a dark brown - it might become bitter.
Take off fire and add the water.  The sugar will form a sheet - but then it will eventually dissolve in the water.

Add the pinch of salt, pitted chopped dates, coffee brew, cinnamon and vegetable oil.
Bring to a boil and then allow the mixture to simmer for about 15-20 mins.
Take off fire.
Allow to cool thoroughly.
Gradually stir in the flour and see that there are no lumps.
It should be the right cake batter consistency but just in case it is thick add a little water to get it to the right.

Pour in the greased bowl and place in microwave
It should take about 4-5 minutes only on full 100%
Check by inserting a knife tip in the center.

PS - The coffee and date combination is quite good too.

Thursday, February 9, 2012

Marble Cake

Another post - from Sa - a first attempt at Marble Cake that she made from a Mary Berry's recipe.  She however said she did not make the icing. She felt it was rich enough without it.


For 5
Butter - 110 gms softened butter
Caster sugar – 110 gms
Self raising flour - 130 gms
Baking powder – 1 level tsp
Eggs – 2 large
Milk – 1 tbsp
Vanilla – ¼ tsp
Cocoa powder – ¾ tbsp level
Hot water – 1 tbsp

Preheat oven 160 C.
Lightly grease a 1 lb loaf tin
Line with non-stick parchment paper on sides and base
Put the butter, sugar, flour, baking powder, eggs, milk and vanilla extract into large bowl
Beat well for about two minutes until the mixture is well blended
Spoon half into another bowl and keep aside
In another bowl, mix cocoa powder and hot water together till smooth.
Cool slightly.
Add to one of the bowls of cake mixture, mix till well blended.
Spoon randomly the vanilla and chocolate cake mixtures into the prepared tin till the whole mixture is used up.
Level the surface gently.
Bake for 50-60 mins till cake is well risen and springy to touch and starts to shrink from sides of tin
Allow to cool in tin for few minutes and turn out on a wire rack.
Peel of lining paper and allow to cool completely.

If you wish to make icing - ( you can use half the quantity for the above cake)
Butter – 25 gms
Cocoa powder – 15 gms sifted
Milk – 1-2 tbsp
Icing sugar – 100 gms – sifted
Melted white chocolate – 25 gms

Melt butter in small pan, add cocoa, stir to blend for one minute
Stir in milk and icing sugar. Remove from heat. Mix thoroughly.
Spread on cake evenly.
Drizzle the melted white chocolate on top and allow to set.

Monday, January 2, 2012

Banoffee Pie

This is a recipe sent to me by La - she said her friend A makes it and you could not go wrong with it.  I had a couple of friends coming over and I thought I would experiment on them.  I also had a pack of ice cream in the freezer as standby.  Not only was the dish a great hit, the balance of the pie was packed and taken away!

The picture is rather plain... I did not want to grate chocolate on what I thought was already a rich dessert  and I also could not get thick cream and that gave it a rather flat surface.  I will replace the picture in the future when I turn out a better dish.  The recipe here is as it was passed onto me.. with suggestions in italics


Ingredients
Oatmeal biscuits- 2 packets (preferably Hobnobs) - I used Good Day 
Chocolate Chip Cookies – 2 Packets (for instance, Good Day)
Butter- melted (approx. Enough for the biscuits) This is over 100 gms
Condensed milk - 400 gms
Bananas – at least 3 (large)
Cream – 300 ml - Get thick cream.. 
Dark Chocolate- 1 Bar (optional) but it does add the finishing touch.  Even a chocolate sauce would do. 

 1. Put all the biscuits in a polythene cover and crush them with a belan till powdery. 
(Or put in a blender like I did)

2.  Place them in a container (which is the final container in which the Banoffee pie will ultimately be set. 
(If you have a cake tin with a removable base it would be ideal. You could also put in greased paper I think- then you can set the dessert on a plate while serving)

3.  Melt the butter and cover the biscuits such that each portion of the biscuit layer has some butter. Put the container in the freexer for 20 minutes (at least)
(It might be a better idea to mix the butter with the biscuit crumbs well, and then place in the container)

4. Once out of the freezer, cut the bananas into small, thin slices and put them on the biscuit layer. Put it back in the freezer.

5. Empty the condensed milk tin in a pan and keep on heat stirring all the time until brown-ish (avoid burning)à [this is the faster method] or but condensed milk tin in a double boiler for approx. 2 hours till it carmelises in the tin itself.
(Caution - if the cans are not covered in water, it may explode and Nigella in her recipe version says you may have to spend hours cleaning up the ceiling!)


6. If you use the first technique mentioned in point 5 above, then use a hand blender and whisk till it becomes slightly liquidy. I had to add some milk to make it thin. 

7. Pour the caramel ( Dulce de Lechelater on top of the banana layer.

8. If you are using fresh cream, add sugar to the cream (2-3 tb sp), and whip it till slightly thick. 

9. Put the cream on top of the toffee layer. Put this in the freezer till the cream solidifies.

10.   Grate the dark chocolate bar and put the chocolate on top of the cream.

Take out of freezer and keep out for a while before serving.  It becomes easier to slice through the pie   this way.  


I had no picture of the sliced banoffee pie. I did not want to take out the camera in presence of my guests and I had no slice remaining to photograph either!!

But you could make it look like this .

Thursday, December 29, 2011

Instant Mysore Pak - Microwave Method


Not quite the original but quicker and makes for an instant sweet when you have guests. Will work on it again, but want it recorded here for further tweaking of recipe.
Besan – ½ cup
Sugar – powdered – 1 cup ( I added slightly lesser)
Ghee – ½ cup
Milk – 2 tsp
First lightly roast the besan in a pan with a teaspoon of ghee – till the raw taste is lost ( you can do it in the microwave, but you will have to be extra careful that it does not burn)
Grease a plate and keep ready
Take a microwave safe bowl. Put the ghee in it and microwave on high for till it melts
Add the rest of the ingredients.
Microwave on high for about 2 ½ minutes.  Every 40 secs or so, pause and stir the mixture to incorporate some air.
The mixture will begin to bubble.
Pour into greased plate.  While still warm cut into diagonal squares.
When cool the pieces will separate easily.
Store. 

Yes, it is as simple as it reads!!

Sunday, December 18, 2011

Adhirasam - Ariselu

Adhirasam or Ariselu as they call it in the city I live is a delicious sweet.  I had tried making it once before - and  it was a major disaster, the flour just disintegrated while frying.  I was sure that was my first and last attempt, until I chanced upon this post - which was title Adhirasam for beginners and had a step by step recipe with pictures. And this is the end result...

Ingredients:
Rice – 1 cup
Grated Jaggery  – 3/4 cup
Cardamom Powder - 1/2 tsp
Ghee - 1 tspl 
Oil -deep frying

Wash rice, soak for an hour
Drain and spread out to dry on a cloth for at least 10 minutes
When still damp, grind to a fine powder - maybe not extra fine.
Ensure there are no lumps

Place jaggery in a little water, heat to dissolve.  Strain to remove impurities.
In a thick bottomed pan, put the jaggery solution back and heat, and it starts bubbling.
Let it form a syrup.  Test by dropping syrup in a dish with water.
It should form a soft ball
Take the vessel off the heat.
Add the ghee and cardamom powder. Mix

Slowly add the rice flour, a little by little till the whole amount is used up.
Mix well.  And place the pan back on a low heat
Keep on heat for about 10 mins, stirring all the time to allow the dough to cook
Remove off the heat.  Cool.
Make small balls and spread on a banana leaf or plastic sheet ( I always use the inside of a milk sachet)
Do not spread it too thin.  

Meantime, heat the oil for frying 
Once the oil is hot, reduce the flame.
Drop a small ball of dough into the oil to test if it holds. If it does not, a good tip given by Tickling Palates ( link given above) is to add a teaspoon of wheat flour for every cup of rice flour. 
Place the flattened dough into the hot oil.  It will sink first and then rise.
Immediately flip over to prevent over browning and burning.
Remove from oil.  And press to remove the excess oil.  
Place on a tissue roll to further remove the oil.

Cool and store. 
Do check the link for the step by step instructions. It is fail-proof like I happily found out.
The adhirasams were crisp and just the right sweetness.  I think I should have kept them slightly thicker - I like them a little softer but never mind. 
The recipe seems long, but it is not as tough as it appears.

Saturday, November 26, 2011

Hung Curd Desi Tiramisu

I saw this recipe on many of the websites. And since I did not know where to get mascarpone, I decided to try the hung curd recipe. It was not bad.  While I could have devoured a trifle pudding of this serving size, I somehow had to finish this dessert in two sittings!  And that if you know me is very surprising!

Tiramisu - is actually an Italian dessert that literally means 'pick me up'  And it has eggs, some liquor  - so this one here is really a desi eggless version.


Ingredients:

Sponge Cake - 1 small
Custard Powder - Vanilla flavoured - 4-5 tbsp
Milk - 1 1/2 glass or roughly 350 ml
Sugar - 6-7  tbsp
Hung curd - 4 tbsp
Instant coffee powder - 1 tbsp
Cream - 3 tbsp


Take about 100 gms of curd, put in a muslin cloth and allow the water to drain out
You can do this by keeping it in the fridge for about 2 hours
The curd that you use should not be sour. 

Slice the cake - I used a readymade sliced Brittania cake

Make the custard with the vanilla powder as per directions on the pack. Let it be slightly thick
Allow to cool.
Add the hung curd to the cooled vanilla custard.
Mix well

I also added a little sugar to the beaten cream ( since I did not get whipped cream)

Make a coffee decoction by dissolving the coffee powder in about 1/4 tbsp of water.  Check to see the strength of the mixture. If it is too strong, you can reduce the quantity to be used

Now to assemble the desert. Take a suitable glass

Layer - 1
Dip the cake in the coffee solution briefly 
And place at the bottom of the glass
Or since I found the coffee decoction a little too strong, I placed the cake slice in the glass and then drizzled the coffee lightly on it.
Layer - 2 
Then a layer of the custard-hung curd mixture
Layer - 3
And a layer of cream

Repeat 1-2-3 till you fill the glass
Grate a little chocolate on the top - you can sprinkle some coffee powder through a sieve if you like
And then chill for about 2 hours so that it sets well before serving.

Midway through the dessert -when I had my fill -  I could see the layers clearly like this


LinkWithin

Related Posts with Thumbnails